


Note: Updated 1/07
(Changes made to the stitch count shown. The old version listed stitch counts for making a wider bag for dolls instead of this beanie baby sized one as pictured.)
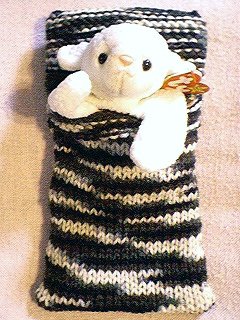
No-Sew Beanie Baby Sleeping Bag with Attached Pillow
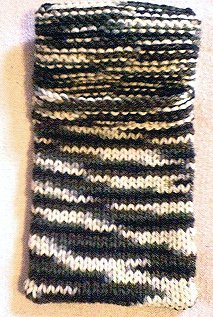
I knit these beanie baby sleeping bags with Bernat Camouflage worsted weight yarn (shown in picture), and other worsted weight acrylic yarns, and size 9 (US) needles. I did it by doing a double Knitting technique, knitting both sides of the bag at the same time by doing K1, Slip 1 purlwise (with yarn in back), across each row, after increasing in each cast on stitch to make enough for both sides of the bag, without having the bottom too wide to cause a flared edge. Then after separating the sides and casting off the front, (after doing 3 garter ridge rows on the top edge of the front to keep it from curling, then turning the pouch inside-out, to expose the V-stitch side of the stockinette stitch), I then did the increasing again on every stitch on the back side, to be able to make the double knit pouch to form the pillow. After knitting the pillow pouch using the double knitting technique again, I separated the sides of the pillow, and cut pillow stuffing and stuffed it up, and then did a 3-needle bind off, joining the front side with the back side, to finish it off. The whole thing is knit flat, (but in the round essentially), in one piece, and completed without any sewing of any seams. Just the way I like! Here is a basic pattern of how to make them.
No-Sew Beanie Baby Sleeping Bag
With Attached Pillow
Worsted weight yarn
Size 9 (US) needles (3 needles needed for transferring stitches around, a needle one size up or down will do just fine for the spare one)
Body:
Cast On 20 sts.
Increase in each stitch across row. (40 sts total)
Knit 1, slip 1 (purlwise with yarn in back) across row.
Repeat this row until about 7” long, (about 32 rows on each side).
Do 6 rows of garter stitch (knit 6 rows for 3 garter ridges) on the front side only (do this by purling one row, then knitting one row, on the front layer sts, 3 times-or for a simpler edge you can just work these rows the same as before and have a rolled edge instead).
Separate the front and the back sides layers, and place on separate needles.
Cast Off the front side layer stitches only. (20 sts cast off, and 20 sts remain for other side)
Pillow:
Increase in each stitch of the back side. (40 sts total again)
Knit 1, slip 1 (purlwise with yarn in back) across row.
Repeat until about 3” long from the pillow increase row, (about 11 rows each side).
Separate front and back side layers, stuff the pillow with fiberfill, then do a 3 needles bind off to join.
Note: You’ll have to fiddle around with transferring stitches back and forth between needles, using an extra one to hold stitches in the process, until you have them lined up front to back properly to do the 3 needle bind off.
Turn the bag inside out to have the smooth side of the stockinette stitch fabric showing (as shown in pictures, above), or leave it with the purl side out if you prefer-Knitter's Choice!
This double knitting technique can be useful for many types of knit items, from purses to men's ties and extra thick pot holders. See Elizabeth Zimmermann's Knitter's Almanac for a wonderful baby blanket/sleeping bag (and practice potholder) done with double knitting. (I highly recommend this knitting book, as well as all of her books! All are must haves on a knitter's book shelf!)
© 2001 by Dawn Adcock. You may copy and share this pattern for personal, non-commercial use, as long as this copyright notice remains intact. Please do not post to the internet, include on a website, or republish without prior permission. E-mail: dawn@3gcs.com
Questions?